DIY Invitations: Worth the time and savings?
I will be the first to brag about how much I saved by creating my own invitations, but I will also be the first to admit that this was one of the biggest undertakings of the DIY wedding projects. There are SO many details that go into making invitations, and I would suggest that unless you have a small guest list (for our 100 guest wedding I only created about 50 invitations) this might be an area where you should save TIME instead of money and find an affordable website or store who designs and sells invitations. The details of mine were the most time consuming, but additionally it was quite a process to address each invitation and RSVP envelope so that they were pretty enough to be proud of! I opted against hiring a calligrapher and instead used a lengthy process of handwriting, tracing, and faux calligraphy which left me EXHAUSTED and ready to get these bad boys in the mail
But in the spirit of helping others who are still willing to take on a similar project, I'll share a quick rundown of how I created these.
But in the spirit of helping others who are still willing to take on a similar project, I'll share a quick rundown of how I created these.
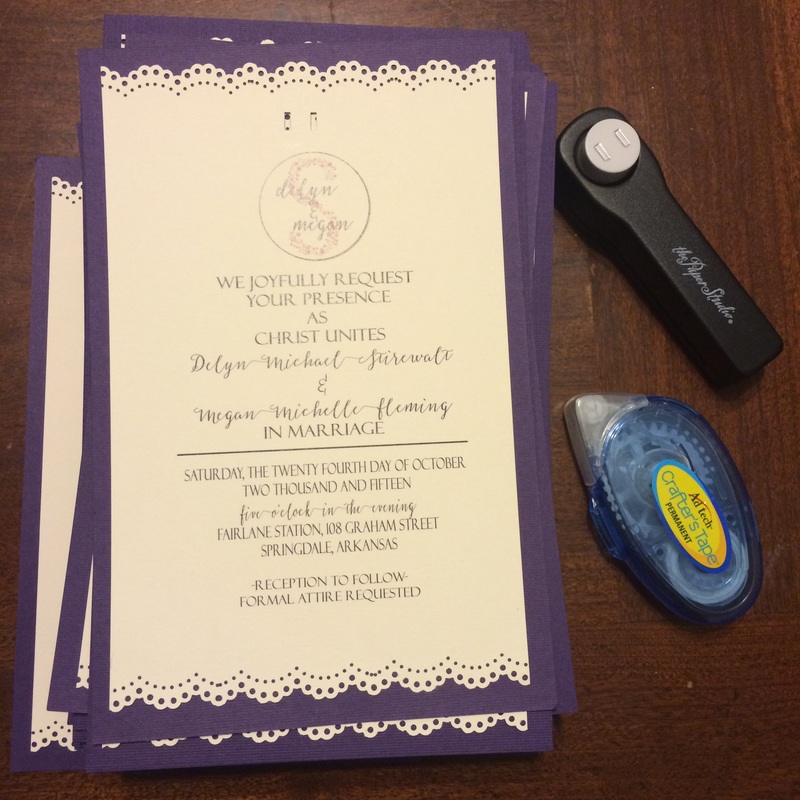
Supplies
- Ivory Cardstock (or light color of your choice)
- Textured Cardstock (accent color)
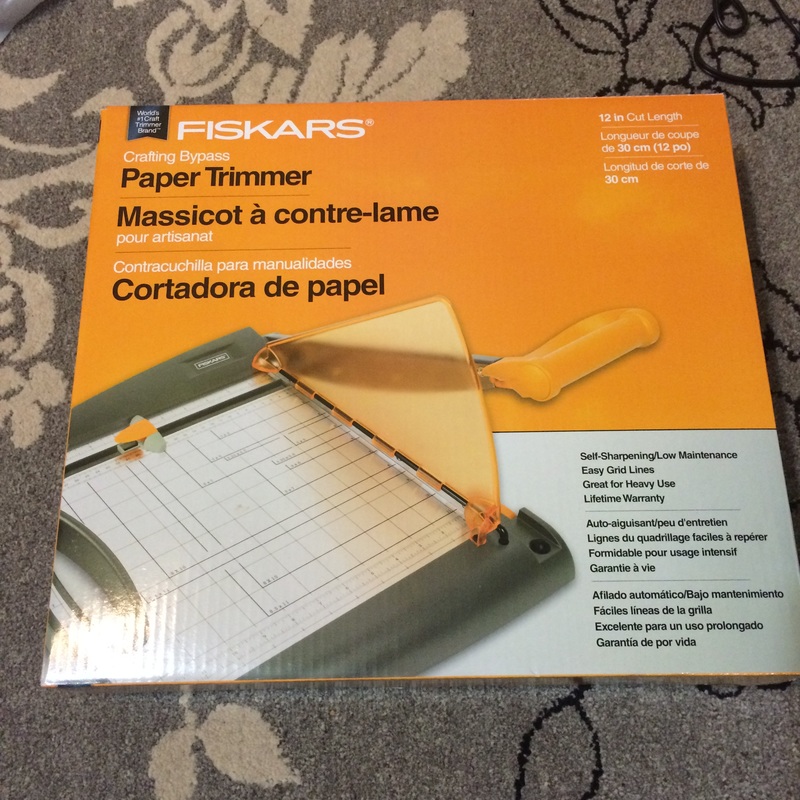
- Paper Trimmer
- Double Sided Rolling Craft Tape
- Small Rectangular Double Hole Punch
- 3/8 in Ribbon for Decorative Bow
- ~2 in Double Sided Satin Ribbon for outer band
- Lace Edge Punch
- Envelopes for Invitations (mine were 5.75 x 8.75 in)
- Envelopes for RSVP Cards (mine were 4.4 by 5.75in, I believe)
- Postage for invitations and RSVP invitations (keep in mind your invitations will likely require additional postage)
- Scissors
- Hot Glue gun and glue
DIY Invitations Tutorial
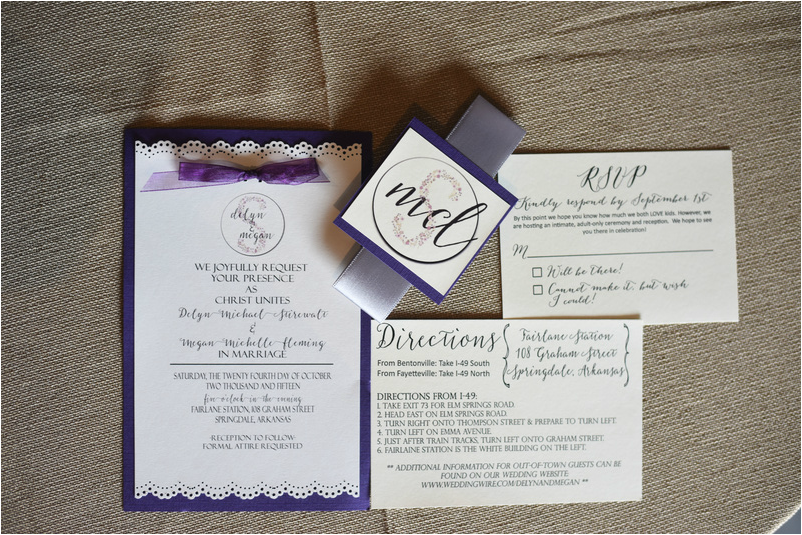
- Design your invitations and RSVP Cards- I used photoshop to design my invitations and RSVP Cards. Make sure to create a new template with a transparent background and select an appropriate design size. My finished product (fully matted) was about 5x7in, so I worked backwards to find the right size for the designed portion. The designed invitation was about 4x6in, printed (2) per page so that I could trim down and add details as desired. For now, focus on pretty fonts, incorporating any monogram or designs, and ensuring that everything is legible. Test print one or two to ensure you like how it prints. Once you have your final design you can print at home on the light colored cardstock or at an office store. Similarly, print your RSVP cards, you can likely print about (4) per page. Base the RSVP card size on the envelope size you prefer.
- Cut out accent paper- Before you worry about cutting down your invitations, let's take care of the accent paper that the invitations will be mounted on. Decide on the final invitation size and make sure this leaves room to stuff them into the envelopes you purchased. I cut my accent paper down to 5x7in pieces using my paper trimmer.
- Cut out invitations- Now that you have a better idea of how how your invitations will look once they are mounted, you can adjust how much you want to trim the invitations down. I like to leave about a half inch margin or less, so I trimmed down my invitations accordingly with the paper trimmer and made sure to leave enough room to add a fun lace edge punch to the top and bottom margins.
- Add lace edge punch detail- For me, this was the most painful part, but I knew I needed to add this detail. I used the lace edge punch and carefully punched the top and bottom of each invitation three times on each side. I was careful to line up the design so that it was continuous, but it was sure tedious.
- Mount your invitations onto your accent paper- Using your double sided rolling tape, add enough to the back of your invitation to be able to durably fasten to your accent paper. Slow down on this step as you will want to make sure to take your time to keep your lines straight and accurate.
- Add rectangular hole punch detail- Once your invitations are fully fastened, you can add the double rectangle hole punch to the top of each invitation. These don't have to be perfect and will vary from invitation to invitation, but ultimately I tried to keep the hole punch centered both width wise and length wise-- between the top lace design and the beginning of the invitation design.
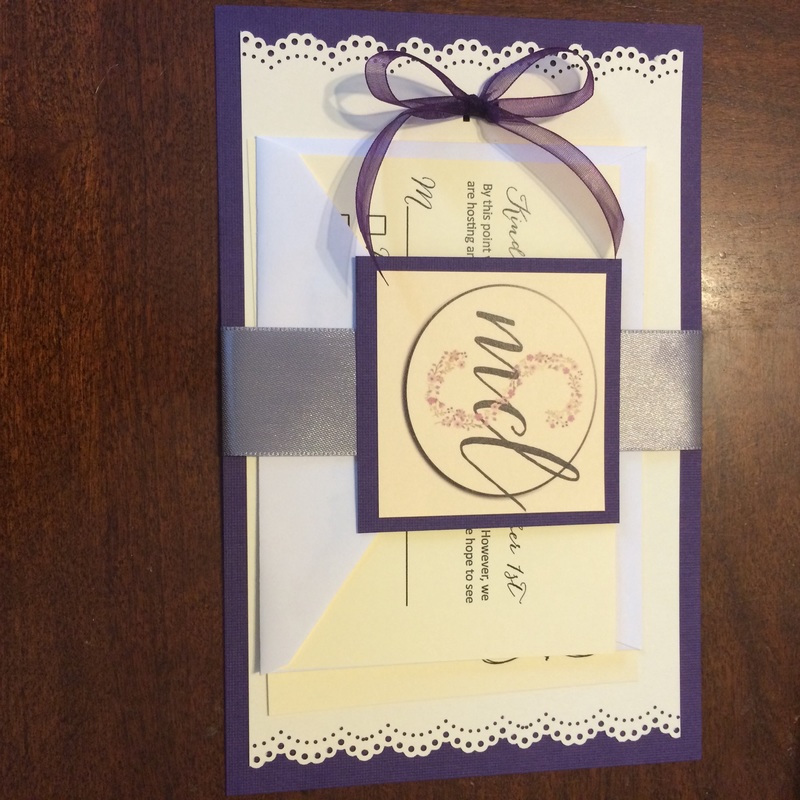
- Tie your ribbon- Your ribbon length will vary depending on how big or small you want your bow to be. You will simply thread the ribbon through the holes you punched and tie a bow with the slack. I used a trial and error process for size, but once I found my desired size I cut out ribbon pieces accordingly using the first piece as a model. Once your bow is tied, this should finish off the invitation!
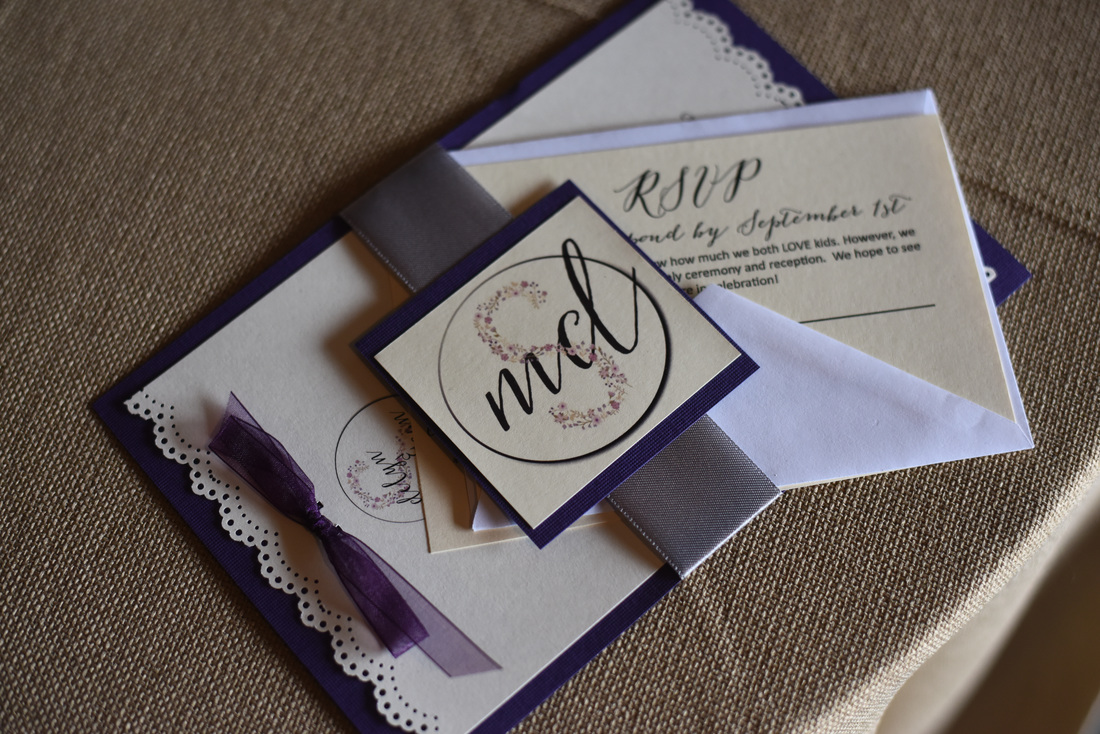
- Address your envelopes and RSVP envelopes- Here is where you can hire a calligrapher, enlist a friend, trace, or freehand. I used a combination of tracing and faux calligraphy. I designed a stamp for our return address which went on the back of our formal invitations to save time.
- Add postage to RSVP envelopes- You are about to begin combining and stuffing your envelopes, so at this time you will want to add basic postage to your RSVP envelope only.
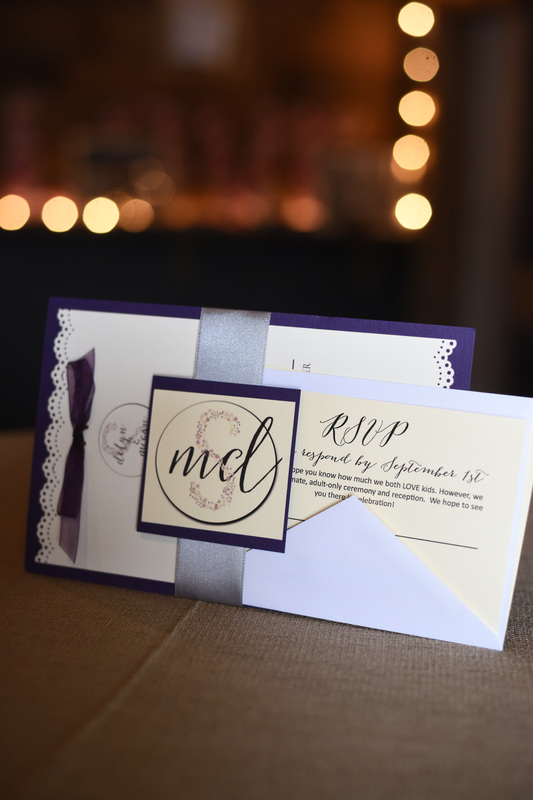
- Bundle your invitations- At this time, stack your invitations on bottom, any type of directions card, and your RSVP card and envelope on top. Have your individual stacks prepared for the next step.
- Jazz up your bundle- I used a large double sided satin ribbon to wrap around the bundle of invitation goodies. I used hot glue to connect the ribbon, and then glued on a mounted monogram embellishment as a final touch.
- Stuff your envelopes, weigh, and add postage- Now you are ready to stuff your envelopes! I would recommend weighing the first fully prepared example to see how much postage you will need! Mine required additional postage, so I purchased the pretty two ounce stamps from the post office.
 RSS Feed